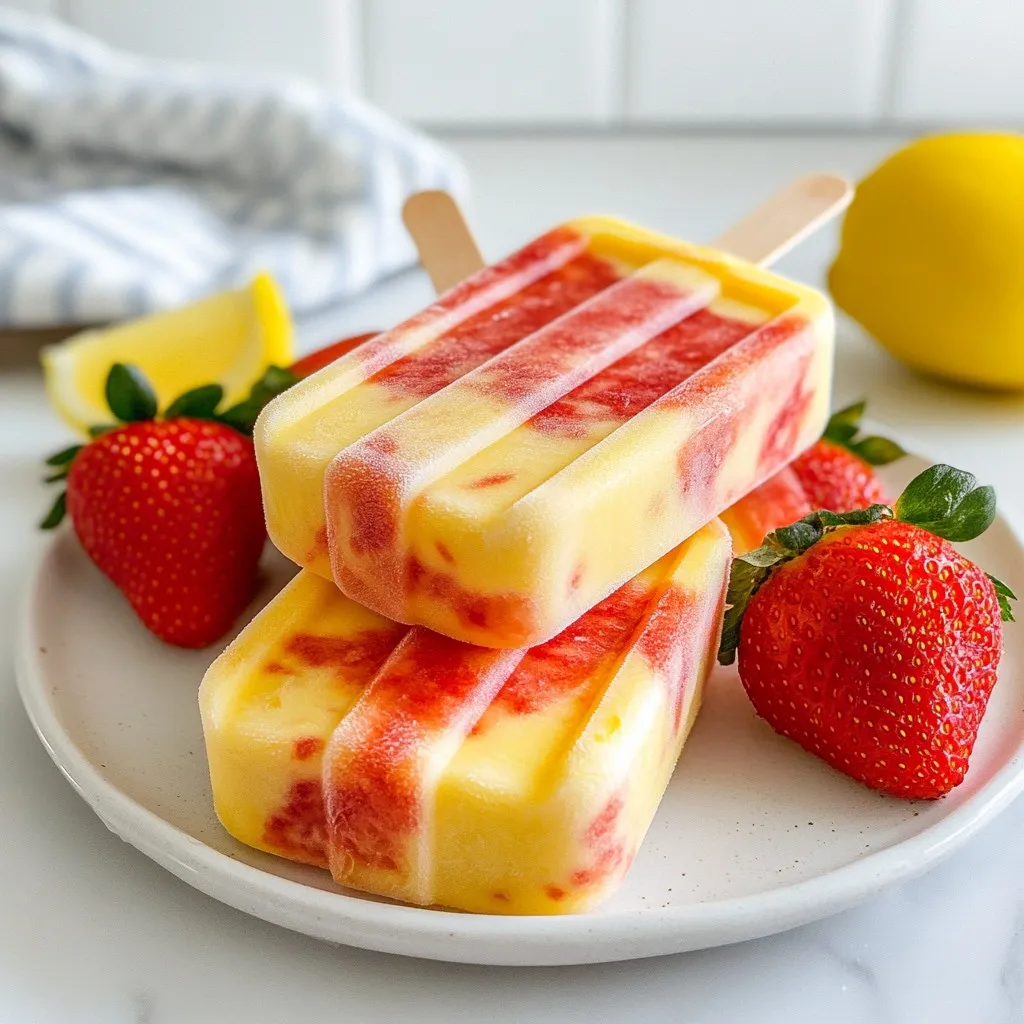
If you’re looking for a fun and tasty treat, you’re in the right place! Strawberry Yogurt Swirl Popsicles are not just easy to make; they’re also a perfect way to cool off on a hot day. With fresh strawberries, creamy yogurt, and a touch of sweetness, these pops are sure to be a hit. Let’s dive into simple steps and tips to create your own frozen delight!
Why I Love This Recipe
- Refreshing Taste: These popsicles are a delightful combination of sweet strawberries and creamy yogurt, making them the perfect summer treat.
- Easy to Make: With just a few simple ingredients and minimal effort, you can whip up a batch of these delicious popsicles in no time.
- Healthy Option: Using Greek yogurt provides a good source of protein, while the natural sweetness of the strawberries keeps things wholesome.
- Customizable: You can easily adjust the sweetness or add other fruits to make these popsicles your own unique creation.
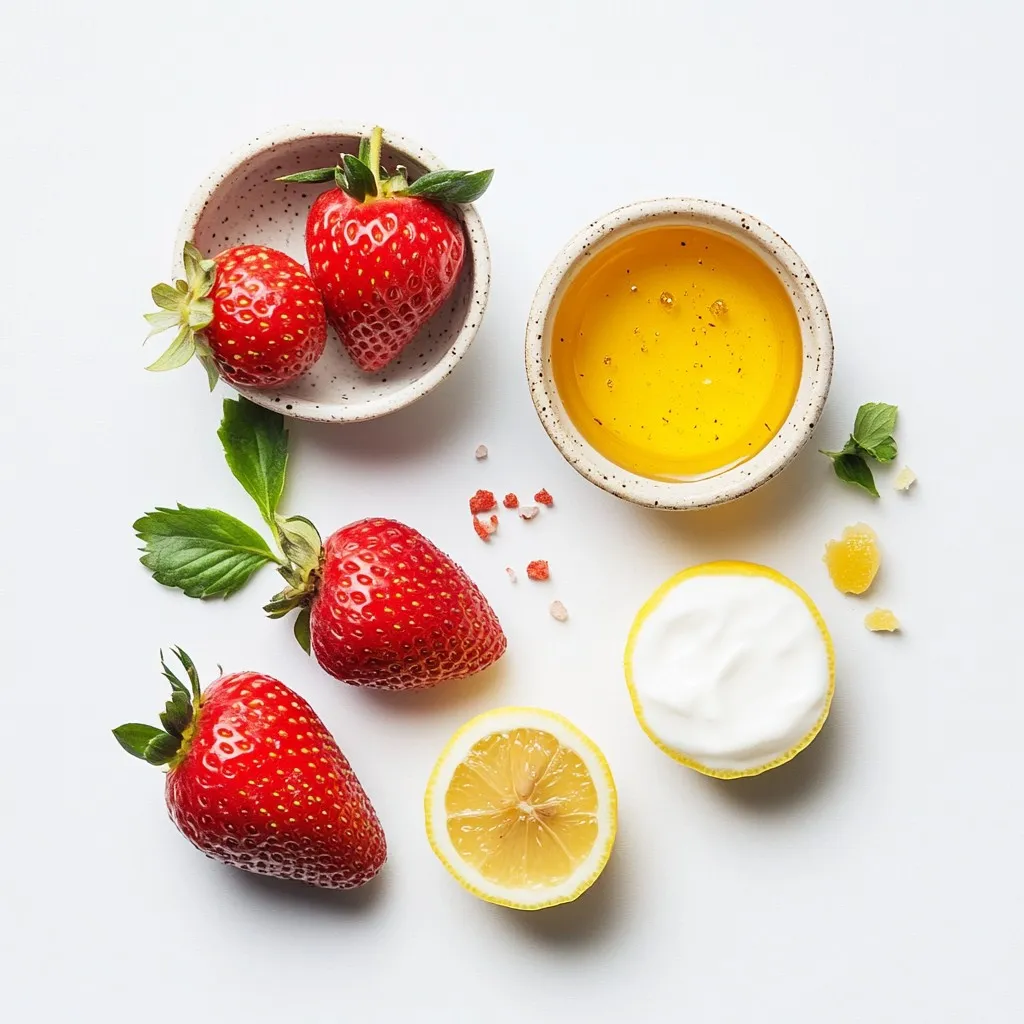
Ingredients
Fresh strawberries
You need 2 cups of fresh strawberries. Start by hulling and slicing them. Fresh strawberries give the popsicles a bright, sweet taste. They also add a pretty color and texture.
Sweeteners (honey or maple syrup)
You can use 2 tablespoons of honey or maple syrup. This sweetens your strawberry layer. Adjust the amount based on your taste. If you want it sweeter, add more.
Greek yogurt and seasoning
For the yogurt layer, use 1 cup of Greek yogurt. Choose plain or vanilla for extra flavor. Mix in 1 tablespoon of honey or maple syrup to sweeten. A pinch of salt adds depth to the flavor. This mix creates a creamy, smooth layer that pairs well with the fruity strawberry.
Step-by-Step Instructions
Preparing the strawberry mixture
First, gather your fresh strawberries. You need two cups of hulled and sliced strawberries. Place them in a blender. Add two tablespoons of honey or maple syrup. This will sweeten the strawberries. Then, add one tablespoon of freshly squeezed lemon juice. Blend everything until it is smooth. You can keep some chunks for texture if you like. This mixture gives your popsicles a fruity base.
Mixing the yogurt layer
Next, take one cup of Greek yogurt. You can use plain or vanilla. In a mixing bowl, add one tablespoon of honey or maple syrup. This sweetens the yogurt layer. Also, add a pinch of salt. Stir the mixture well until it is smooth and creamy. This yogurt layer adds a nice contrast to the strawberry mix.
Assembling and layering in molds
Now, grab your popsicle molds. Start by pouring a few spoonfuls of the strawberry puree into each mold. Then, add a layer of the yogurt mixture on top. Use a skewer or toothpick to swirl the two mixtures gently. This creates a marbled look. Be careful not to overmix, or you’ll lose the pretty design. Continue layering until the molds are full. Finish with a swirl of strawberry puree on top. Insert the popsicle sticks and place the molds in the freezer. Let them freeze for at least four to six hours. When they are solid, run warm water over the molds to release the popsicles easily. Enjoy your colorful, tasty treat!
Tips & Tricks
Adjusting sweetness levels
To adjust the sweetness of your popsicles, you can add more or less honey or maple syrup. Start with the basic recipe. Taste the strawberry mixture before you blend. If it’s too tart, add a little more sweetener. Remember, you can always add more, but you can’t take it out! For a lighter option, try using less sweetener or skip it entirely.
Swirling techniques for marbling
Swirling creates a pretty marbled look. To do this, pour your yogurt and strawberry mixtures in layers. Use a skewer or toothpick to gently swirl them together. Don’t overmix! You want to see both colors. A good swirl makes your popsicles look fancy and bright.
How to easily release popsicles from molds
To release your popsicles, run warm water over the outside of the molds. This helps loosen them. Hold the molds under the water for just a few seconds. After that, gently pull them out. If they stick, try twisting the mold a bit to help them come free. This way, you keep your popsicles intact and ready to enjoy!
Pro Tips
- Use Frozen Strawberries for a Creamier Texture: If fresh strawberries aren’t available, frozen strawberries work perfectly. They add a creamier texture to the popsicles when blended.
- Experiment with Flavors: Feel free to mix in other fruits like blueberries or mango for a unique twist. Just blend them in with the strawberries for a delightful combination.
- Layering Technique: For a more visually appealing popsicle, create alternating layers of yogurt and strawberry puree. This not only looks beautiful but also enhances the flavor with each bite.
- Storage Tips: To keep your popsicles fresh, wrap them individually in plastic wrap after freezing. This prevents freezer burn and keeps them tasting great for weeks!
Variations
Adding additional fruit layers
You can make your popsicles even more fun by adding other fruits. Try mango, blueberries, or kiwi. Just blend them separately, like you did with the strawberries. Layer them in the molds with the yogurt and strawberry mixtures. This adds flavor and color. It also makes each bite a surprise!
Using different types of yogurt (Greek, dairy-free)
Greek yogurt works great, but you can switch to other yogurts. Dairy-free options like almond or coconut yogurt are tasty too. Each type brings a unique flavor. If you want it creamier, go for thicker yogurt. For a lighter taste, choose a regular yogurt. Experiment to find your favorite!
Incorporating mix-ins (nuts, granola, etc.)
Mix-ins can add a nice crunch to your popsicles. Consider adding chopped nuts, granola, or even chocolate chips. Just stir them into the yogurt layer before you layer the popsicles. This adds texture and makes each pop more exciting. Choose what you love best for a personal touch!
Storage Info
Best practices for freezing popsicles
To keep your popsicles fresh, use clean, dry molds. Fill them to the top, but leave a little space. This helps the mixture expand as it freezes. Cover the molds with plastic wrap before adding the sticks. This prevents ice from forming on top. If you plan to store them longer, wrap each popsicle in plastic wrap. This extra layer protects them from air.
How long popsicles will last in the freezer
Strawberry yogurt swirl popsicles can stay fresh for about two months in the freezer. After this time, they may lose flavor and texture. For best taste, enjoy them within the first month. Always label your popsicles with the date you made them. This helps you keep track of freshness.
Signs of freezer burn and how to avoid it
Freezer burn shows as white, icy spots on your popsicles. It happens when air reaches the food. To avoid this, tightly wrap your popsicles. Use airtight containers or freezer bags when storing them. If you see freezer burn, you can cut it away. The popsicle will still taste good, but the texture may not be as nice.
FAQs
Can I use frozen strawberries instead of fresh?
Yes, you can use frozen strawberries. They work well in popsicles too. Just make sure to thaw them a bit before blending. This way, you can achieve a nice, smooth texture. The flavor will still be great, but fresh strawberries may add a brighter taste.
How do I know when the popsicles are fully frozen?
Popsicles are ready when they feel solid and hard. Typically, they need about 4-6 hours in the freezer. If you poke one with a skewer and it feels firm, it is set. You can also check by pulling one out carefully. If it comes out cleanly, it is ready to enjoy!
Are strawberry yogurt swirl popsicles healthy?
Yes, strawberry yogurt swirl popsicles are a healthy treat. They are made with fresh fruit and Greek yogurt, which packs protein and probiotics. You can adjust the sweetness too, using less honey or maple syrup if desired. Enjoy these popsicles as a tasty snack or dessert without guilt!
You can create delicious strawberry yogurt swirl popsicles with just a few simple steps. Start by mixing fresh strawberries, sweeteners, and yogurt. Layer them for fun swirls and try different fruits or yogurt types. Remember to wrap your popsicles well for the best storage methods. These treats can be healthy and enjoyable for everyone. Make sure to experiment with flavors and textures. Enjoy your tasty creations, and share them with friends and famil