Looking for a festive treat that will wow your guests? Try my Eggnog Cheesecake! This delightful holiday dessert combines smooth cheesecake with the warm flavors of eggnog. It’s creamy, rich, and perfect for any holiday table. Whether you want to impress family or indulge yourself, this easy recipe is just what you need. Let’s explore the ingredients and steps that will make this dessert a holiday favorite!
Why I Love This Recipe
- Festive Flavor: This cheesecake embodies the warm, comforting flavors of the holiday season with its rich eggnog taste and aromatic spices.
- Decadent Texture: The smooth and creamy texture of the cheesecake is perfectly complemented by the crunchy graham cracker crust, creating a delightful contrast.
- Easy to Make: With straightforward steps and easily accessible ingredients, this recipe is perfect for both novice and experienced bakers.
- Impressive Presentation: Serve this gorgeous cheesecake topped with whipped cream and freshly grated nutmeg for a stunning dessert that will wow your guests.
Ingredients
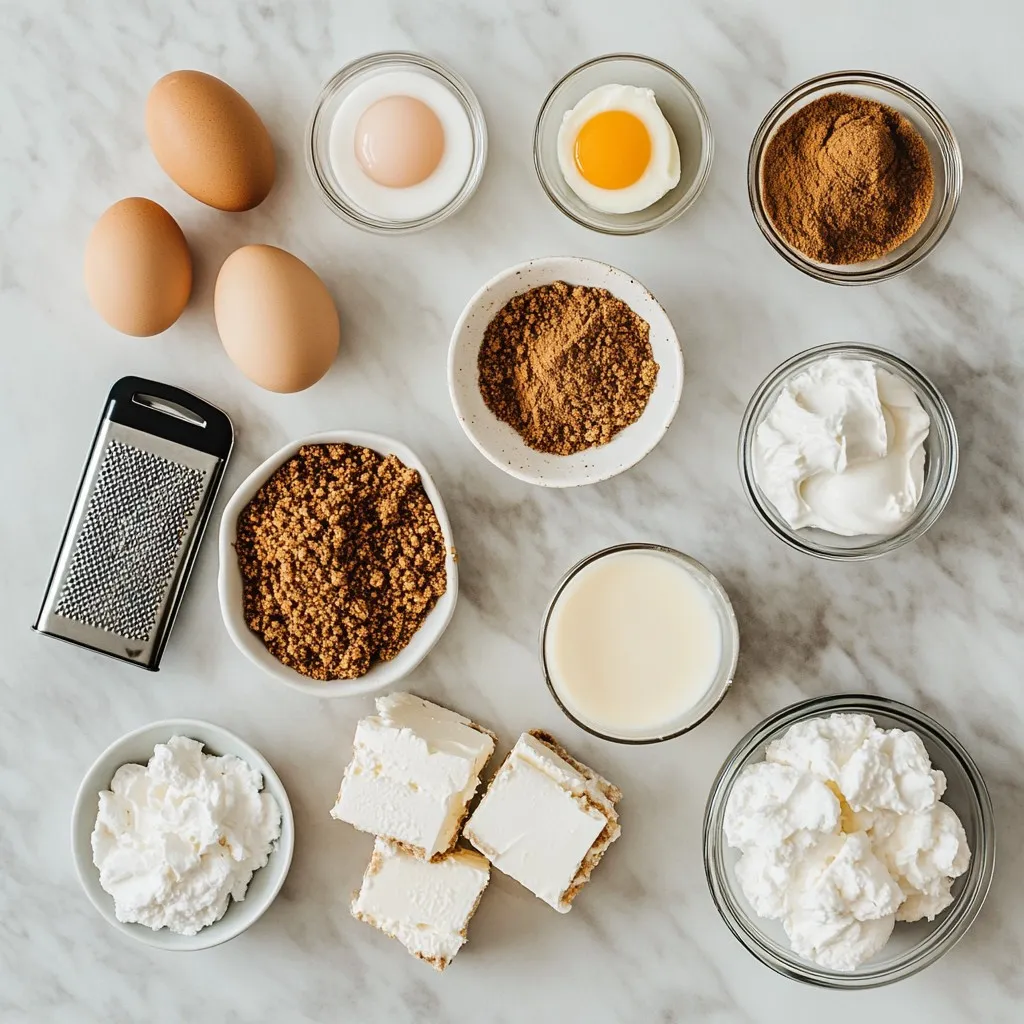
List of Ingredients
For this eggnog cheesecake, you will need:
– 1 ½ cups graham cracker crumbs
– ½ cup unsalted butter, melted
– 2 tablespoons granulated sugar
– 3 packages (8 ounces each) cream cheese, softened
– 1 cup granulated sugar
– 3 large eggs, at room temperature
– 1 teaspoon pure vanilla extract
– 1 teaspoon ground nutmeg
– 1 teaspoon ground cinnamon
– 1 cup eggnog (store-bought or homemade)
– Whipped cream for topping (optional)
– Freshly grated nutmeg for garnish (optional)
Ingredient Substitutions
You can switch out some ingredients if needed:
– Use cookie crumbs instead of graham cracker crumbs for a different crust flavor.
– Coconut oil can replace unsalted butter for a dairy-free option.
– If you want a lighter cheesecake, low-fat cream cheese works well.
– Almond milk or soy milk can replace eggnog for a non-dairy cheesecake.
Tips for Selecting Fresh Ingredients
Choosing fresh ingredients is key for great taste. Here are some tips:
– Cream Cheese: Look for blocks of cream cheese instead of spreads. They will give you the best texture.
– Eggnog: Check the expiration date on store-bought eggnog. If you make your own, use fresh eggs and whole milk for rich flavor.
– Spices: Buy whole spices and grind them fresh for the best flavor. Whole nutmeg is nice and fragrant.
– Butter: Choose high-quality unsalted butter for a rich taste. It makes a big difference in your crust.
By focusing on fresh, quality ingredients, your eggnog cheesecake will shine!
Step-by-Step Instructions
Preheating the Oven and Preparing the Pan
First, we need to preheat your oven to 325°F (160°C). This step is key to getting the right texture for your cheesecake. While the oven heats, grab a 9-inch springform pan. Grease it with butter or cooking spray. This helps the cheesecake come out easily later on.
Making the Crust
In a medium bowl, mix together 1 ½ cups of graham cracker crumbs, ½ cup of melted unsalted butter, and 2 tablespoons of granulated sugar. Stir everything until it looks moist. Next, firmly press this mixture into the bottom of your springform pan. This forms a solid base. Bake the crust for 10 minutes in your preheated oven. Once done, take it out and let it cool completely in the pan.
Preparing the Cheesecake Filling
Now it’s time to make the delicious filling! In a large mixing bowl, use an electric mixer to beat 3 packages of softened cream cheese on medium speed. This should become smooth and creamy. Gradually add in 1 cup of granulated sugar. Mix until it is all combined. Then, add 3 large eggs one at a time. Make sure to mix well after each egg. Next, stir in 1 teaspoon of pure vanilla extract, 1 teaspoon of ground nutmeg, 1 teaspoon of ground cinnamon, and 1 cup of eggnog. Mix gently until just combined. Be careful not to overmix!
Baking and Cooling Instructions
Carefully pour the cheesecake filling over the cooled crust. Use a spatula to spread it evenly. Place the cheesecake in the oven and bake for 55-60 minutes. The edges should be set, while the center has a slight jiggle. It will firm up as it cools. After baking, turn off the oven. Leave the cheesecake inside with the door slightly ajar for 1 hour. This helps prevent cracks. Once cooled, take it out and let it cool at room temperature. Transfer it to the fridge and chill for at least 4 hours. For the best taste, chill it overnight. Enjoy your festive treat!
Tips & Tricks
Achieving the Perfect Texture
To get a smooth and creamy cheesecake, start with room temperature cream cheese. Cold cream cheese can create lumps. When mixing, beat on medium speed until the mixture is silky. Add the eggs one by one, mixing after each one. This helps the batter blend well. Be careful not to overmix after adding the eggnog and spices. Overmixing can cause air bubbles, which may lead to cracks.
Common Mistakes to Avoid
One common mistake is not letting the cheesecake cool slowly. After baking, leave it in the oven with the door ajar. This helps prevent cracks. Another mistake is skipping the chilling time. Chilling for at least four hours, or overnight, is crucial. This allows the flavors to meld and the texture to set. Don’t rush this step; it makes a big difference!
Enhancing Flavor with Spices
Eggnog is festive, but spices can make it even better. Ground nutmeg and cinnamon add warmth and depth. You can also try adding a pinch of ground cloves for a unique twist. If you want more spice, mix in some ginger or allspice. These flavors bring out the holiday spirit in every slice!
Pro Tips
- Use Room Temperature Ingredients: Make sure your cream cheese and eggs are at room temperature for a smoother batter, which helps prevent lumps and ensures even baking.
- Prevent Cracks: Cooling the cheesecake in the oven with the door ajar helps to prevent cracks on the surface by allowing it to set gradually.
- Chill Overnight: For the best flavor and texture, allow the cheesecake to chill overnight before serving, as this helps all the flavors meld together beautifully.
- Garnish Wisely: Freshly grated nutmeg not only adds a festive touch but also enhances the eggnog flavor—use it generously for a delightful finish.
Variations
Adding Different Flavorings
You can change the taste of your eggnog cheesecake by adding different flavorings. Try using almond extract instead of vanilla for a nutty twist. You can also add a splash of rum extract for a more traditional eggnog flavor. Want something unique? Add a bit of orange zest to brighten up the taste. Mixing in chocolate chips can give it a sweet surprise. Experiment and find your favorite combo!
Dietary Adjustments
If you need a gluten-free version, use gluten-free graham crackers for the crust. You can also make this dessert dairy-free. Substitute cream cheese with a dairy-free cream cheese. Use a non-dairy butter for the crust, and choose a dairy-free eggnog. These swaps keep the flavor without the dairy.
Serving Suggestions
Serving your cheesecake can be fun. Top it with whipped cream for a creamy touch. A sprinkle of freshly grated nutmeg adds a nice finish. You can also serve it with a side of warm caramel sauce or chocolate sauce. A scoop of vanilla ice cream pairs well, too. Each bite of this cheesecake can be a new experience!
Storage Info
How to Store Leftover Cheesecake
To keep your eggnog cheesecake fresh, store it in the fridge. Place it in an airtight container or cover it tightly with plastic wrap. This helps prevent it from drying out or absorbing other smells. Leftover cheesecake can last for about five days in the refrigerator. If you want to keep it longer, consider freezing it.
Freezing Instructions
You can freeze your eggnog cheesecake for up to three months. First, let the cheesecake cool completely. Then, wrap it tightly in plastic wrap. After that, wrap it in aluminum foil for extra protection. Label it with the date to track freshness. When you are ready to enjoy it, thaw it overnight in the refrigerator.
Reheating Guidelines
You don’t need to reheat cheesecake as it tastes best cold. However, if you prefer it warm, place a slice in the microwave for about 10-15 seconds. Check it often to avoid overheating. You can also let it sit at room temperature for about 30 minutes before serving. This way, it softens slightly and enhances the flavor.
FAQs
Can I use low-fat cream cheese for this recipe?
Yes, you can use low-fat cream cheese. However, the texture may change. Low-fat cream cheese can make the cheesecake less rich and creamy. I recommend full-fat cream cheese for the best flavor and texture. If you choose low-fat, be aware that the cheesecake may not set as well.
How do I prevent cracks on the cheesecake?
To prevent cracks, cool the cheesecake slowly. After baking, turn off the oven and leave the door open for an hour. This step allows the temperature to drop gradually. Also, avoid overmixing the batter. Overmixing can introduce more air, leading to cracks.
Can I make this cheesecake ahead of time?
Yes, you can make this cheesecake a day or two ahead. It actually tastes better when chilled overnight. Just cover it well with plastic wrap or foil. Keep it in the fridge until you’re ready to serve. This makes it a great choice for holiday gatherings!
This blog post covers all you need for a great cheesecake. We explored ingredients, substitutions, and how to choose fresh options. I detailed step-by-step instructions, so you can bake with ease. We discussed tips to achieve the right texture and avoid common mistakes. Variations let you personalize flavors and adjust for diets. Finally, you learned about storage and reheating.
Enjoy making your cheesecake masterpiece! Trust the process, and have fun along the wa