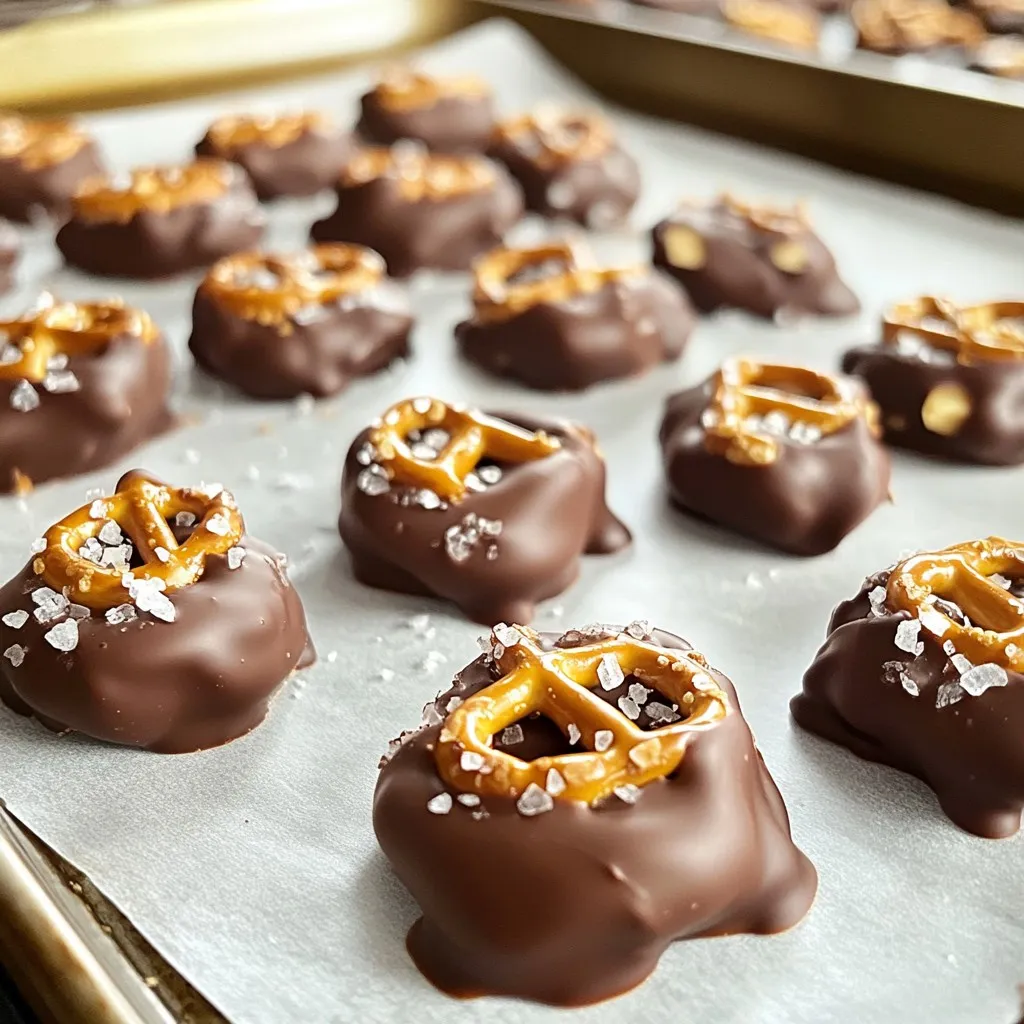
Are you ready for a sweet treat that combines crunch and flavor? Chocolate Pretzel Peanut Clusters are your answer! This easy recipe uses just a few ingredients to create a delicious snack you’ll love. Whether you want to impress your friends or enjoy a cozy night in, these clusters are perfect for any occasion. Let’s dive into making this irresistible snack!
Why I Love This Recipe
- Quick and Easy: This recipe requires minimal prep time and can be made in just 40 minutes, making it a perfect last-minute treat.
- Sweet and Salty Delight: The combination of chocolate, pretzels, and peanuts delivers a delicious sweet and salty flavor that is hard to resist.
- Customizable: You can easily swap out ingredients to suit your taste, such as using different nuts or adding dried fruit.
- Great for Sharing: These clusters are perfect for parties, gatherings, or as homemade gifts that everyone will love.
Ingredients
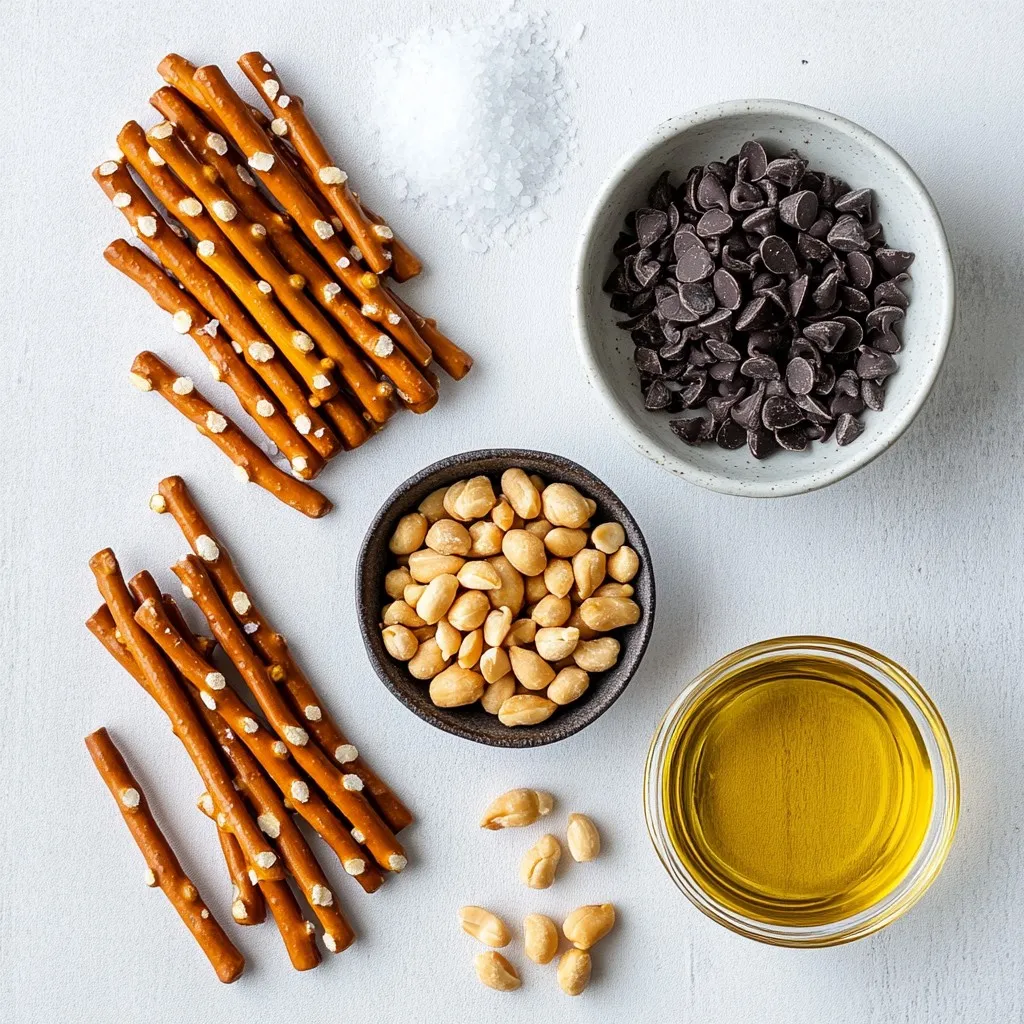
List of Essential Ingredients
– 1 cup pretzel sticks, carefully broken into small pieces
– 1 cup unsalted roasted peanuts, preferably organic
– 1 ½ cups dark chocolate chips (at least 60% cocoa for richer flavor)
– 1 tablespoon coconut oil, allows for a glossy finish
– Sea salt, for a delicate sprinkle on top
Optional Ingredients
– Additional toppings (e.g., dried fruit, caramel drizzle)
– Serving suggestions (e.g., fresh fruit, ice cream)
When making chocolate pretzel peanut clusters, the right ingredients matter. First, I love using pretzel sticks for their crunch and shape. Break them into small pieces for even coating. Unsalted roasted peanuts add a nutty taste and texture. Look for organic peanuts if you can, as they taste better.
Next, dark chocolate chips are key. I recommend using chips with at least 60% cocoa. This gives a rich, deep flavor. Coconut oil is my secret for a smooth finish. Just a tablespoon makes a big difference.
Finally, don’t forget the sea salt! A sprinkle on top enhances the sweet and salty flavor. You can also get creative with optional toppings. Dried fruit or a drizzle of caramel can add extra flair. You can serve these clusters with fresh fruit or ice cream for a fun treat.
Step-by-Step Instructions
Preparation Start
– Line the baking sheet with parchment paper.
– Create a smooth and flat surface for easy removal.
Chocolate Melting Process
– Combine chocolate chips and coconut oil in a microwave-safe bowl.
– Heat in intervals of 30 seconds and stir well.
Mixing Ingredients
– Add pretzel pieces and peanuts to the melted chocolate.
– Fold gently to coat every piece with chocolate.
Forming Clusters
– Drop generous clusters onto the prepared baking sheet.
– Leave about an inch between each cluster for spreading.
Finishing Touches
– Sprinkle a pinch of sea salt on top of each cluster.
– Cool at room temperature for 10 minutes, then refrigerate for 30 minutes.
Tips & Tricks
Achieving the Perfect Chocolate Coating
Using good quality chocolate is key. It impacts the taste and look of your clusters. Choose dark chocolate chips with at least 60% cocoa for a rich flavor.
Temperature control is also vital. Melt your chocolate slowly in the microwave. Heat it in 30-second bursts. Stir well between each burst. This helps avoid burning and keeps your chocolate smooth.
Modifying Texture and Flavor
To adjust saltiness, use more or less sea salt. A light sprinkle enhances the sweet and salty mix. Try adding more salt for a bold flavor.
For different textures, swap the peanuts. Use almonds, cashews, or even sunflower seeds. You can also change the pretzels. Try sticks, twists, or chocolate-covered ones for fun variations.
Presentation Tips
When your clusters are set, serve them on a nice platter. This makes for an eye-catching display. You can drizzle extra melted chocolate on top for added flair.
Add garnishes like crushed nuts or colorful sprinkles. These small touches make your treats look even more appealing. Serve them with fresh fruit for a bright contrast.
Pro Tips
- Use Quality Chocolate: Opt for high-quality dark chocolate with at least 60% cocoa content for a richer flavor and smoother texture in your clusters.
- Chill for Best Results: Allow the clusters to chill in the refrigerator until the chocolate is fully set. This will ensure they hold their shape and have a nice snap.
- Experiment with Mix-ins: Feel free to add other ingredients like dried fruits, seeds, or even a splash of vanilla extract to customize your clusters to your taste.
- Presentation Matters: For an elegant touch, arrange your clusters on a decorative platter and consider adding a drizzle of melted chocolate or a sprinkle of chopped nuts on top.
Variations
Flavor Variations
You can change the flavor of your clusters easily. Try using milk or white chocolate instead of dark chocolate. This swap will give a creamier taste. You can also add spices for a kick. A dash of cinnamon or cayenne can make your treat unique and fun.
Dietary Modifications
If you need gluten-free snacks, use gluten-free pretzels. They taste great and keep the crunch. For a nut-free version, replace peanuts with seeds. You can also use chocolate-covered raisins for sweetness. These swaps make it easy for everyone to enjoy.
Seasonal Variations
You can dress your clusters up for holidays. Adding colored sprinkles makes them festive. For special occasions, think about themed snacks. You can use shapes or colors that match the event. This extra touch makes your clusters even more special.
Storage Info
Best Practices for Storage
After you make your chocolate pretzel peanut clusters, let them cool completely. First, allow them to set at room temperature for about 10 minutes. Then, put the baking sheet in the fridge for about 30 minutes. This helps the chocolate harden properly.
For storage, I recommend using airtight containers. Glass or plastic containers work well. You can also use a resealable plastic bag. Just make sure to keep the clusters in a single layer. This prevents them from sticking together.
Shelf Life
These clusters stay fresh for about a week at room temperature. Keep them in a cool, dry place. If you want them to last longer, store them in the fridge. In the fridge, they can stay good for up to two weeks.
For the freezer, wrap the clusters tightly in plastic wrap, then place them in an airtight container. They can last for about three months. To enjoy them later, just thaw them in the fridge overnight.
Reheating Tips
If you need to melt the chocolate clusters again, do it safely. Place them in a microwave-safe bowl. Heat them in small bursts of 10 to 15 seconds. Stir between each burst to avoid burning.
After storage, you can serve the clusters as is. They taste great cold or at room temperature. For a fun twist, pair them with fresh fruit or a scoop of ice cream. Enjoy your treats!
FAQs
Can I use different types of chocolate?
Yes, you can use milk chocolate or white chocolate. Each type gives a different taste. Milk chocolate will be sweeter, while white chocolate has a creamy flavor. Just ensure that it melts smoothly. Use the same melting method as dark chocolate.
How long do these clusters last?
These clusters last about two weeks when stored properly. Keep them in an airtight container at room temperature. If you need them to last longer, store them in the fridge. Just remember to let them come to room temperature before eating.
Can these be made ahead of time?
Absolutely! You can make these clusters a few days in advance. Once they are set, store them in an airtight container. This makes it easy to serve them later when you need a quick treat.
Are there any nut-free substitutions?
Yes, you can replace peanuts with seeds like sunflower or pumpkin seeds. You can also use chocolate-covered raisins for a different twist. Just make sure to check for allergies if you share these treats.
How do I keep the clusters from sticking together?
To prevent sticking, keep the clusters spaced apart on the baking sheet. Once they set, store them in a single layer in an airtight container. If stacking, place parchment paper between layers for easy separation.
This blog post covered how to make delicious chocolate clusters. You learned the essential and optional ingredients needed, along with step-by-step instructions. Tips and tricks helped refine your technique, while variations let you customize to your taste. We also discussed storage to keep your clusters fresh longer.
Enjoying these treats is easy and fun. Experiment with flavors and make them your ow