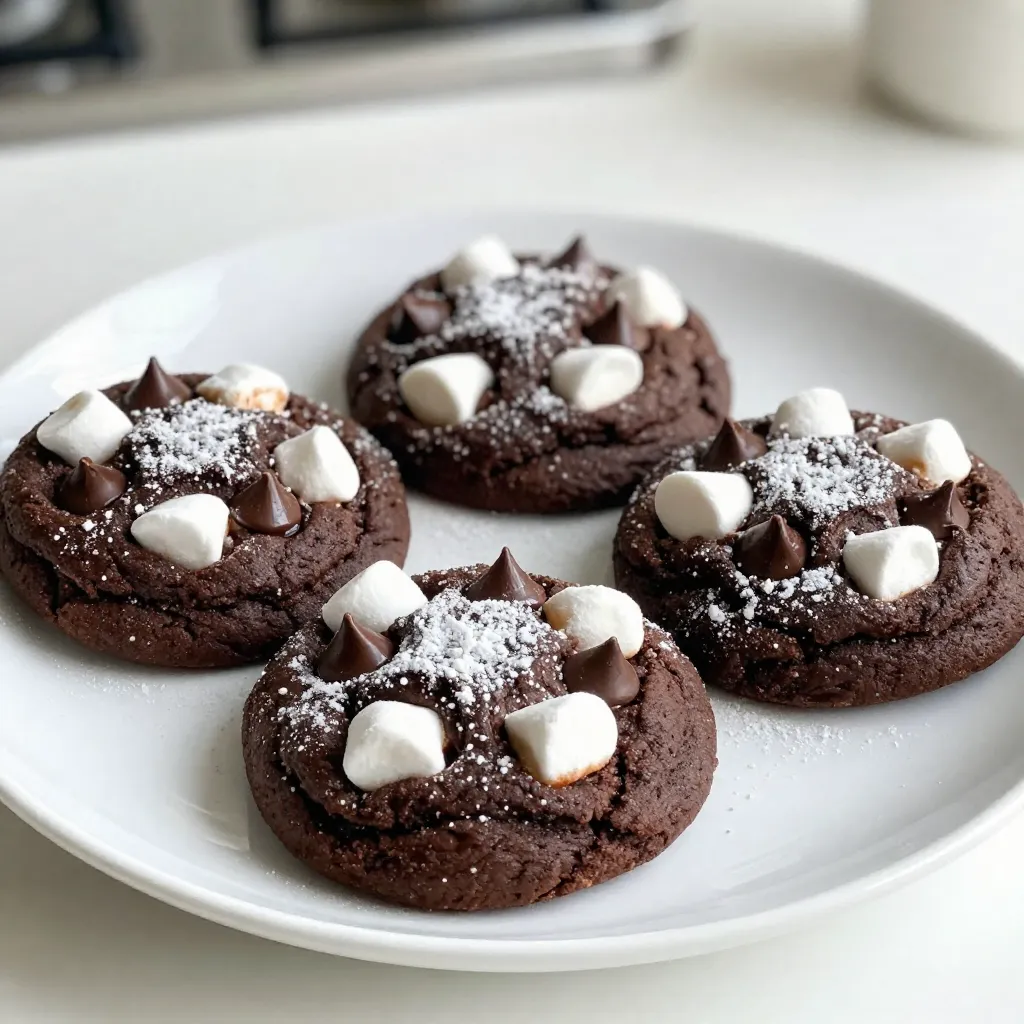
Looking for a sweet treat that’s both fun to make and delicious? You’re in the right place! These Chocolate Marshmallow Cookies are easy to whip up and perfect for sharing. Packed with gooey marshmallows and rich chocolate, they deliver joy in every bite. Whether you’re a baking pro or a newbie, you’ll find simple steps and helpful tips to guide you. Let’s dive into this delightful recipe and create some cookie magic together!
Why I Love This Recipe
- Decadent Flavor: The combination of chocolate and marshmallows creates a rich and indulgent taste that is simply irresistible.
- Perfect Texture: These cookies are soft and chewy on the inside with a delightful gooeyness from the marshmallows.
- Quick and Easy: With only 15 minutes of prep time, they are a fast treat to whip up for any occasion.
- Customizable: You can easily add your favorite nuts or swap chocolate types, making this recipe versatile for any preference.
Ingredients
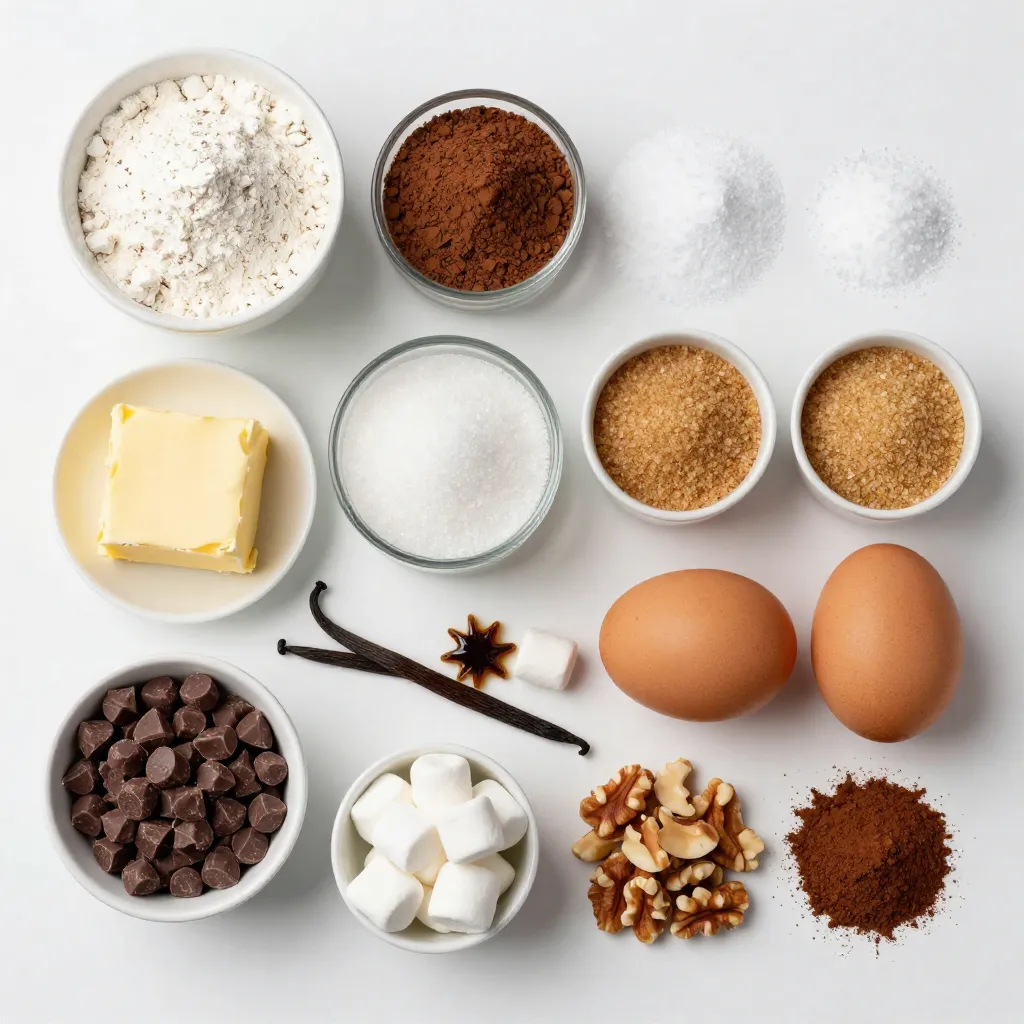
List of Ingredients with Measurements
To make these tasty chocolate marshmallow cookies, you will need:
– 1 cup all-purpose flour
– 1/2 cup unsweetened cocoa powder
– 1/2 teaspoon baking soda
– 1/4 teaspoon salt
– 1/2 cup unsalted butter, softened
– 1/2 cup granulated sugar
– 1/4 cup packed brown sugar
– 1 large egg
– 1 teaspoon pure vanilla extract
– 1 cup semi-sweet or dark chocolate chips
– 1 cup mini marshmallows
– 1/2 cup chopped nuts (like walnuts or pecans – optional)
– 1/4 teaspoon espresso powder (for a richer chocolate taste)
Optional Ingredients for Added Flavor
You can boost the flavor with these extras:
– Chopped nuts, like walnuts or pecans, add crunch.
– A sprinkle of sea salt on top can enhance sweetness.
– Add a touch of cinnamon for warmth.
Key Ingredient Substitutions
If you don’t have something, here are swaps you can use:
– Use coconut oil instead of butter for a dairy-free option.
– Swap all-purpose flour with gluten-free flour for a gluten-free treat.
– Use almond extract instead of vanilla for a nutty twist.
– Replace chocolate chips with white chocolate or butterscotch chips for a unique flavor.
These options help you customize your cookies to fit your taste and dietary needs!
Step-by-Step Instructions
Preparing the Oven and Baking Sheet
First, set your oven to 350°F (175°C). This temperature helps the cookies bake evenly. Next, line a baking sheet with parchment paper. This step keeps the cookies from sticking. You want to make sure they come off easily.
Mixing Dry Ingredients
In a medium bowl, whisk the following dry ingredients together:
– 1 cup all-purpose flour
– 1/2 cup unsweetened cocoa powder
– 1/2 teaspoon baking soda
– 1/4 teaspoon salt
– 1/4 teaspoon espresso powder
Mix these until they blend well. This mix gives the cookies a rich chocolate flavor. Set it aside for now.
Creaming the Butter and Sugars
In a large bowl, cream together:
– 1/2 cup unsalted butter, softened
– 1/2 cup granulated sugar
– 1/4 cup packed brown sugar
Use an electric mixer for this step. Mix until it becomes light and fluffy, about 2-3 minutes. This process adds air and makes the cookies soft.
Incorporating Wet Ingredients
Now, add the following to the creamed mixture:
– 1 large egg
– 1 teaspoon pure vanilla extract
Beat these into the mix until smooth. You want everything to combine well.
Combining Dry and Wet Mixtures
Gradually add the dry ingredients into the wet mixture. Stir gently until just combined. It’s okay if the dough looks a bit chunky; that’s perfect. Avoid overmixing.
Adding Chocolate Chips and Marshmallows
Next, fold in:
– 1 cup semi-sweet or dark chocolate chips
– 1 cup mini marshmallows
– Optional: 1/2 cup chopped nuts (such as walnuts or pecans)
Make sure these extras are evenly spread throughout the dough. This mix adds sweetness and texture.
Shaping and Baking the Cookies
Using a tablespoon or cookie scoop, drop spoonfuls of dough onto the prepared baking sheet. Leave about two inches apart for spreading.
Then, bake in the preheated oven for 10-12 minutes. Keep an eye on them. The edges should look set, while the centers stay soft and gooey.
Cooling and Serving Instructions
Once you take them out, let the cookies cool on the baking sheet for about 5 minutes. This helps them firm up. After that, move them to a wire rack to cool completely. Enjoy them warm or store them for later!
Tips & Tricks
Baking Tips for Perfect Cookies
To bake perfect chocolate marshmallow cookies, follow these simple tips:
– Measure Ingredients Accurately: Use a kitchen scale or measuring cups to get exact amounts. This helps your cookies turn out just right.
– Room Temperature Butter: Make sure your butter is soft, not melted. This creates a light, fluffy mix.
– Don’t Overmix: When you combine the wet and dry ingredients, stir gently. Overmixing makes cookies tough.
– Use Parchment Paper: Line your baking sheet with parchment paper. This keeps cookies from sticking and helps with cleanup.
Troubleshooting Common Issues
If your cookies do not come out as expected, here are solutions to common problems:
– Flat Cookies: If your cookies spread too much, your butter may be too warm. Try chilling the dough for 30 minutes before baking.
– Dry Cookies: If cookies are dry, you may have added too much flour. Always spoon flour into the cup and level it off.
– Burnt Edges: If edges burn, check your oven temperature with an oven thermometer. It might be too hot.
Enhancing Flavor with Espresso Powder
Adding espresso powder can boost the chocolate flavor in your cookies. Here’s how:
– Just a Touch: Use 1/4 teaspoon of espresso powder. This small amount enhances the chocolate taste without adding coffee flavor.
– Mix It In: Add the espresso powder when you combine dry ingredients. This ensures an even blend throughout the dough.
These tips will help you create delightful chocolate marshmallow cookies every time! Enjoy experimenting and happy baking!
Pro Tips
- Use room temperature ingredients: Ensure your butter and egg are at room temperature for a smoother batter, which helps in achieving a better texture.
- Don’t overmix: When combining the dry and wet ingredients, mix just until incorporated. Overmixing can lead to tough cookies.
- Experiment with marshmallow types: Try using flavored mini marshmallows or even homemade marshmallows for a unique twist on the classic cookie.
- Storage tips: Store the cookies in an airtight container at room temperature to keep them soft and chewy for days.
Variations
Alternative Mix-Ins
You can change up the flavors by adding different mix-ins. Try using chopped nuts like walnuts or pecans for a nice crunch. You might also add candies like M&Ms for a fun twist. Dried fruits, like cranberries or cherries, can give a sweet touch. Each mix-in brings its own flavor and texture.
Gluten-Free Options
If you want to make these cookies gluten-free, swap the all-purpose flour with a gluten-free blend. Look for a mix that works well for baking. You should also check that your cocoa powder and chocolate chips are gluten-free. This way, everyone can enjoy these treats!
Vegan Adaptations
For a vegan version, replace the egg with a flax egg. To make a flax egg, mix one tablespoon of ground flaxseed with three tablespoons of water. Let it sit for a few minutes until it thickens. You can also use vegan butter instead of regular butter. Make sure your chocolate chips are dairy-free, too. This will keep the cookies tasty and vegan-friendly!
Storage Info
Best Storage Practices for Freshness
To keep your chocolate marshmallow cookies fresh, store them in an airtight container. This will help maintain their softness and flavor. Place a piece of bread in the container. The bread adds moisture, ensuring your cookies stay chewy.
Make sure to avoid direct sunlight. Heat and light can dry out your cookies. Instead, keep them in a cool, dark place. If stored this way, they can last up to a week.
Freezing Cookies for Later Use
Freezing is a great option if you want to save some cookies for later. First, let the cookies cool completely. Then, place them in a single layer on a baking sheet. Freeze them for about an hour. This step prevents them from sticking together.
Once frozen, transfer the cookies to a freezer-safe bag or container. Label the bag with the date. Frozen cookies can last up to three months. When you crave a treat, just take out a cookie and let it thaw.
How to Reheat Cookies
Reheating cookies brings back their warm, gooey texture. To reheat, preheat your oven to 350°F (175°C). Place the cookies on a baking sheet. Heat for about 5-7 minutes. This will restore their soft centers.
You can also use a microwave. Heat one cookie on a plate for about 10-15 seconds. This method is quick but can make cookies more chewy than soft. Enjoy your delicious cookies warm!
FAQs
Can I make these cookies ahead of time?
Yes, you can make these cookies ahead of time. You can prepare the dough and chill it in the fridge for up to 24 hours. Chilling the dough helps the flavors blend well. When ready to bake, scoop the dough onto a sheet and bake as directed.
What’s the best way to melt chocolate for drizzling?
To melt chocolate for drizzling, use a double boiler or microwave. For the double boiler, place chocolate in a bowl over simmering water. Stir until smooth. For the microwave, heat in 15-second bursts, stirring in between. This keeps the chocolate from burning and makes it easy to drizzle.
How long do these cookies last?
These cookies last about one week when stored in an airtight container at room temperature. If you want them to last longer, you can freeze them. They keep well in the freezer for up to three months.
Are there any nut-free versions of this recipe?
Yes, you can easily make a nut-free version of these cookies. Simply skip the nuts in the recipe. The cookies will still taste great with just chocolate chips and marshmallows. You can also add more chocolate chips for extra flavor.
Now you know the key steps to bake great cookies. You learned about important ingredients and how to mix them. We covered tips to solve baking problems and make cookies extra tasty. You can try different flavors and storage methods to keep them fresh. Remember, baking is fun! Use the ideas shared here to make your cookies unique and delicious. Enjoy your baking journey and share your tasty result