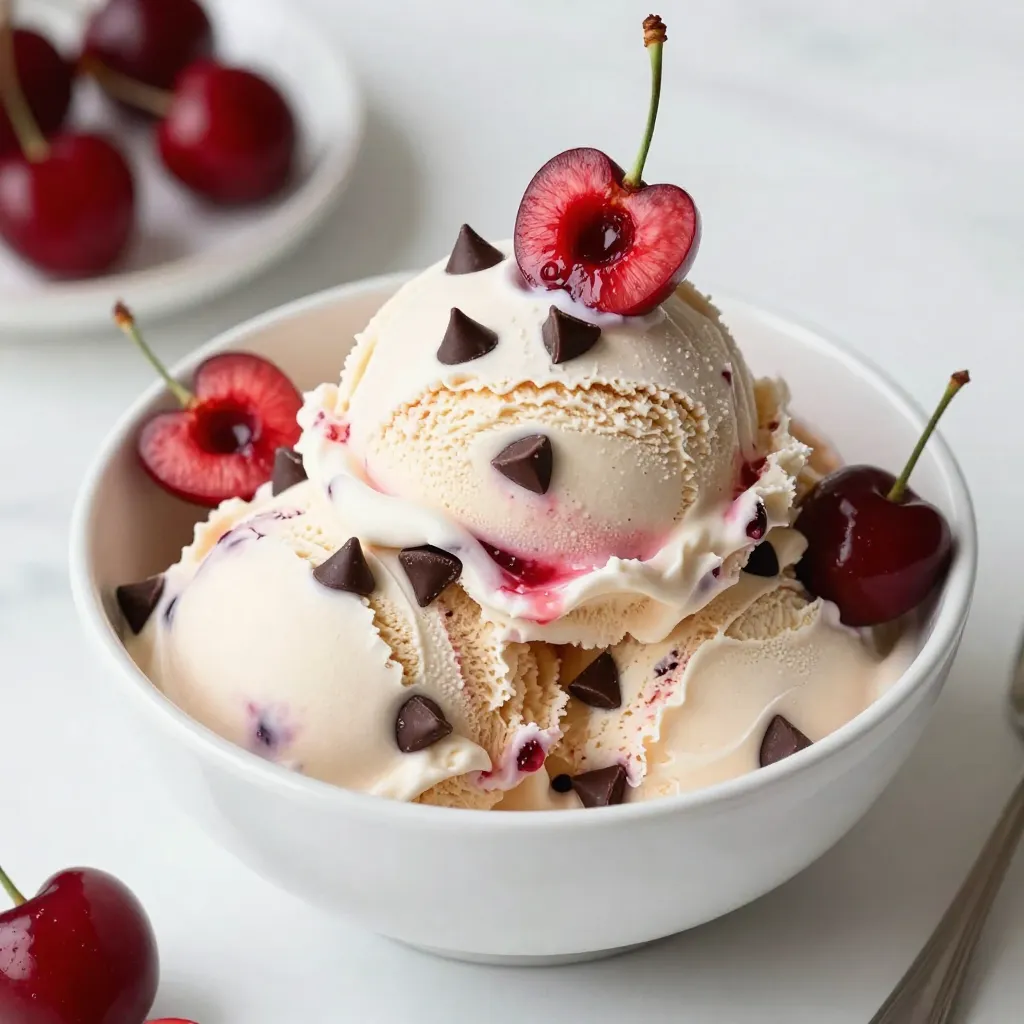
Get ready for a treat! In this blog post, I’ll show you how to make Cherry Chocolate Chip Ice Cream that’s both simple and delicious. With fresh cherries, creamy base, and bites of chocolate, it’s the perfect dessert for any day. You’ll love the easy steps and tips I’ll share. Let’s dive in and make your new favorite ice cream!
Why I Love This Recipe
- Fresh Ingredients: This ice cream uses real cherries, which gives it a vibrant flavor that store-bought varieties simply can’t match.
- Customizable: You can adjust the sweetness or swap out the chocolate for your favorite mix-ins, making it a versatile treat.
- Simple Process: The steps are straightforward, making it a fun activity for both beginners and experienced cooks alike.
- Perfect for Summer: This refreshing dessert is ideal for warm days, offering a delightful balance of flavors that everyone will love.
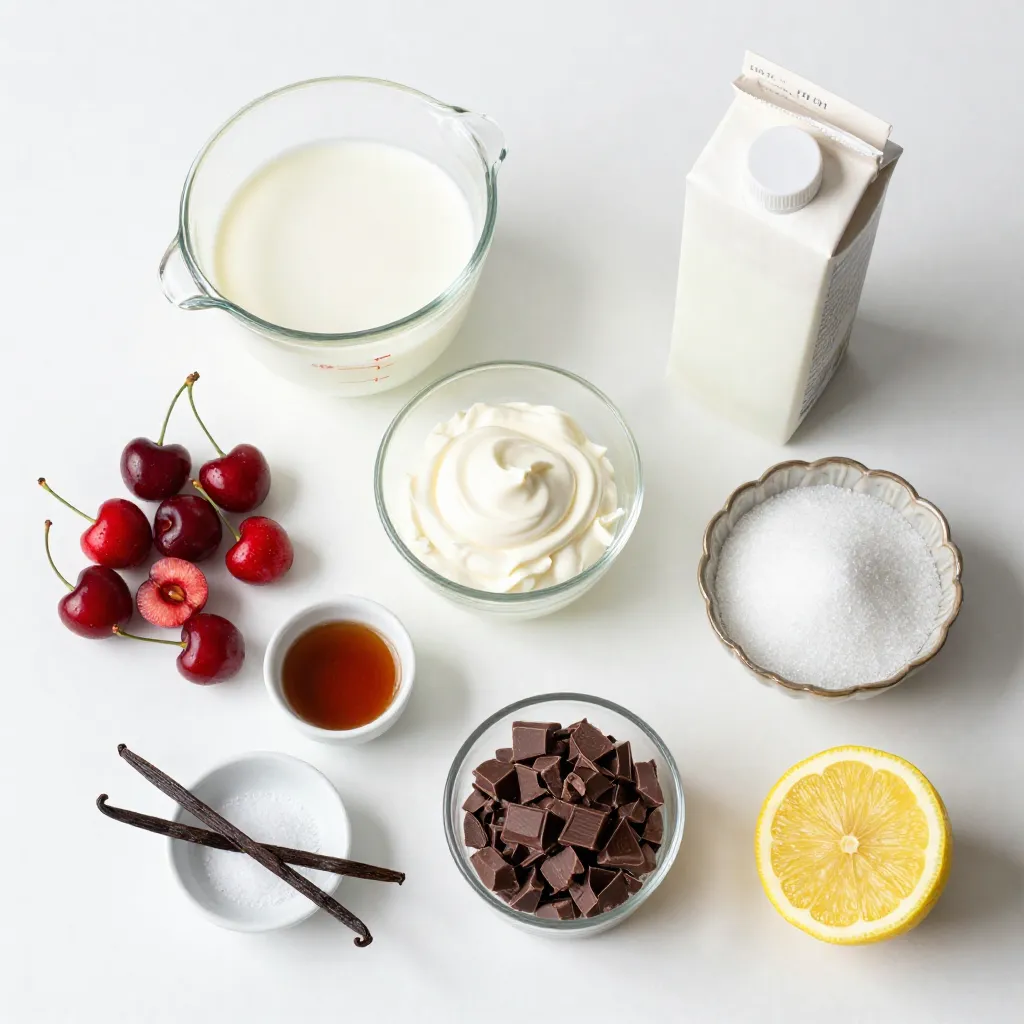
Ingredients
Fresh cherries and their importance
Fresh cherries are the stars of this ice cream. They add bright flavor and natural sweetness. Using ripe, sweet cherries makes the ice cream taste even better. I recommend looking for cherries that are firm and shiny. You want them to be red or dark purple, as they have the best taste. Don’t skip the maceration step! This process helps release the juices, making the cherries even more flavorful.
Sweeteners: Granulated sugar and alternatives
Granulated sugar plays a key role in this recipe. It balances the tartness of the cherries. You will use ¾ cup in total. If you want to try alternatives, consider using honey or maple syrup. Just remember, they will change the flavor a bit. You can also adjust the amount based on your taste. Always taste the mixture before churning it to ensure it’s sweet enough.
Cream and milk: Choosing the right types
For this recipe, you need both heavy cream and whole milk. Heavy cream gives the ice cream its rich and creamy texture. Whole milk helps keep it smooth and light. Make sure to use high-quality dairy products for the best taste. If you want a lighter version, you can use half-and-half instead of heavy cream. Just know it may not be as rich, but it will still taste great!
Step-by-Step Instructions
Preparing the cherries
Start by pitting and halving 2 cups of fresh cherries. This is key for flavor. Place the cherries in a medium bowl. Add 1 tablespoon of lemon juice and 2 tablespoons of granulated sugar. Gently toss the cherries so they get all coated. Let them sit for 30 minutes. This step is called maceration. It helps draw out the sweet juices from the cherries.
Making the base cream mixture
While the cherries sit, take a large mixing bowl. Add 1 cup of heavy cream and 1 cup of whole milk. Next, pour in the remaining ½ cup of granulated sugar. Add 1 teaspoon of pure vanilla extract and ¼ teaspoon of salt. Whisk the mixture well. Keep mixing until the sugar dissolves completely, making it smooth and creamy.
Churning the ice cream and adding chocolate chips
After the cherries are ready, mix them into the cream base. Stir gently to combine everything. Now, pour this cherry-cream mix into your ice cream maker. Follow the machine’s instructions to churn it. This usually takes about 20 to 25 minutes. The ice cream should be soft and fluffy. Once done, fold in ½ cup of semi-sweet chocolate chips. Make sure they spread evenly.
Transfer the ice cream to an airtight container. Smooth the top with a spatula. Freeze it for at least 4 hours. This allows it to firm up. When it’s ready, scoop it into bowls or cones. Enjoy the yummy mix of cherry and chocolate!
Tips & Tricks
Achieving the perfect consistency
To get the best texture, chill your cream mixture well. This helps it churn better. Don’t skip the maceration step for the cherries. It draws out their juices, making the ice cream creamy. When you’re ready to churn, keep an eye on the time. Churn for about 20 to 25 minutes. You want it to be soft-serve, not too hard.
Common mistakes to avoid
One common mistake is not macerating the cherries long enough. This will lead to a less flavorful ice cream. Another mistake is over-churning. If you churn it too long, the ice cream will become too hard. Make sure to use fresh ingredients. Old cream or milk can ruin the taste.
Presentation suggestions for serving
For a fun look, use colorful waffle cones. Scoop the ice cream high for a great visual. Add a few fresh cherry halves on top. A sprinkle of chocolate chips adds a nice touch. A sprig of mint can make it even more appealing. Presentation makes your ice cream feel special and inviting!
Pro Tips
- Use Ripe Cherries: Choose cherries that are bright and plump for the best flavor and sweetness in your ice cream.
- Chill Your Mixture: For a creamier texture, make sure your cream mixture is well chilled before churning it in the ice cream maker.
- Don’t Over-Churn: Keep an eye on the ice cream as it churns. Stop once it reaches a soft-serve consistency to avoid a grainy texture.
- Storage Tips: To prevent ice crystals from forming, press a piece of parchment paper directly onto the surface of the ice cream before sealing the container.
Variations
Adding flavors: Almond or mint extract
You can change the taste of your ice cream by adding flavors. Almond extract gives a nutty hint. Just one teaspoon adds depth. Mint extract brings a fresh taste. Again, one teaspoon is enough. Mix these extracts into your cream base before churning. This small change can make a big difference!
Using different chocolate types
Chocolate chips come in many types. You can swap semi-sweet chips for dark chocolate. Dark chocolate adds a rich taste. White chocolate gives a sweet, creamy flavor. You can even mix them! Try adding chunks of chocolate bars for fun texture. Each type will change the ice cream’s flavor profile.
Dairy-free options for ice cream base
If you want a dairy-free treat, use coconut milk. It gives a creamy texture. Almond milk is another option but may be less rich. Use the same amount as cream and milk. Add a bit of cornstarch to thicken it. This way, you can enjoy delicious cherry chocolate chip ice cream without dairy!
Storage Info
Best practices for storing homemade ice cream
Store your cherry chocolate chip ice cream in an airtight container. This helps keep out air and prevents ice crystals. Use a spatula to smooth the top. This step reduces air pockets, which can make your ice cream icy. Be sure to place a piece of plastic wrap directly on the ice cream before sealing with the lid. This extra layer keeps it fresh longer.
How long can you keep cherry chocolate chip ice cream?
You can keep your cherry chocolate chip ice cream for about two weeks in the freezer. After this time, it may lose some flavor and texture. For the best taste, try to eat it within a week. Always check for any unusual smells or changes in color before serving.
Tips for reviving hard ice cream
If your ice cream gets too hard, don’t worry! Simply take it out of the freezer and let it sit at room temperature for about 5 to 10 minutes. This will soften it, making it easier to scoop. If it’s still hard, you can warm a scoop with your hands for a few seconds. This little trick helps bring back that creamy texture you love.
FAQs
Can I use frozen cherries instead of fresh?
Yes, you can use frozen cherries. Just make sure to thaw them first. This helps the cherries release their juices, just like fresh ones. Keep in mind that frozen cherries may be softer. This can change the texture of the ice cream a little. Overall, they still work well in this recipe.
What if I don’t have an ice cream maker?
If you don’t have an ice cream maker, no problem! You can still make this ice cream. Pour the cherry-cream mixture into a shallow dish. Freeze it for about 2 hours. Then, take it out and stir it well. Return it to the freezer. Repeat this every 30 minutes for about 3 hours. This method helps create a creamy texture without an ice cream maker.
Is this recipe suitable for kids?
Yes, this recipe is great for kids! It has simple ingredients and fun flavors. Kids can help with mixing and adding chocolate chips. Just keep an eye on the sugar amount. If you want to make it healthier, you can reduce the sugar a bit. It’s a delicious treat that everyone will enjoy!
In this blog post, we explored making cherry chocolate chip ice cream. We discussed key ingredients like fresh cherries, sweeteners, and cream choices. I shared simple steps for preparation, churning, and adding chocolate chips. We also covered tips for texture, common mistakes, and fun serving ideas. I offered variations for flavor and dairy-free options, plus smart storage tips. Remember, the right ingredients and care make all the difference in your ice cream. Enjoy your sweet creatio